Google Analytics is the most widely used website analytics service on the Internet. It’s a free service that can be used to keep track of and generate very useful reports on your website’s traffic. Google Analytics helps you collect data on where your traffic is coming from, what your users are doing on your website, what content on your site is most popular, and even the age and gender distribution of your websites users.
In this guide I’ll be walking you through the steps required to setup a Google Analytics account and install your tracking code properly on your website.
Signing Up for Google Analytics
To set up Google Analytics for your website, you’ll need to visit google.com/analytics and create an account. If you already have a Google account, you should choose “Sign In” in the upper right-hand corner, and select Google Analytics from the drop-down menu that appears.

If you don’t already have a Google account, you will need to register for one. I recommend using the same account, for your Google Search Console, Analytics, and Google My Business account. This will make switching between these tools during the day-to-day running of your website a little easier.
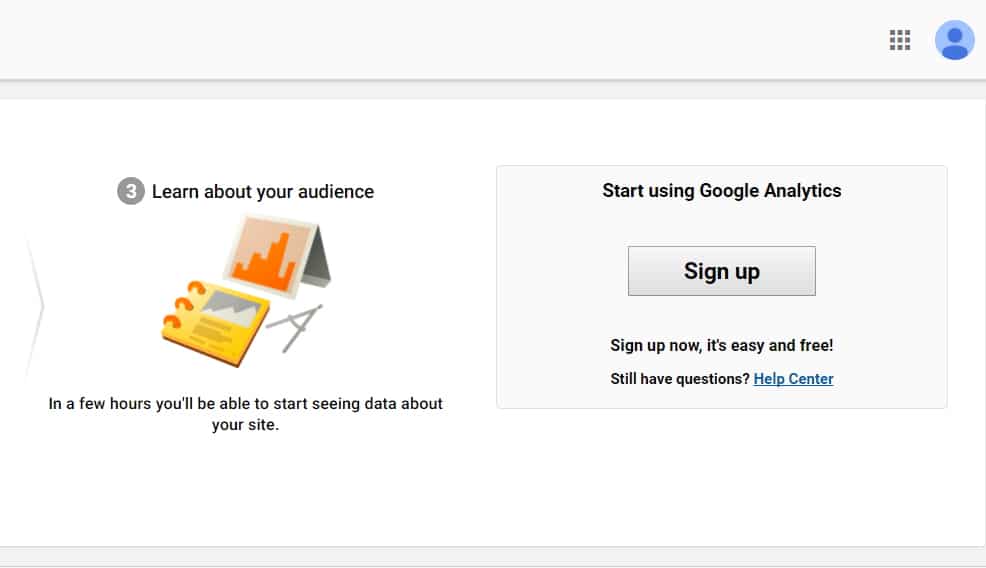
The first thing that Google will do, is walk you through setting up our account. On the next page we can see that it will be a three step process – sign up, add your tracking code, and then learn about your audience. The first thing you need to do, since you don’t have an Analytics account just yet, is to select the “Sign up” button.
Select What To Track
On the following screen, you need to pick what you would like to track – a Website, or Mobile app; it’s already defaulted to Website, so unless you’re tracking a mobile application, you should leave the setup as it is.
The Next step is to give your account a name and setup a property. A property is basically the bucket that you want all of your data to fill up. You may need to setup multiple properties if you have your website, and a mobile website that you want to track separately. Note that each web property you create will receive a unique Tracking ID which you will eventually install on all your matching web-pages.
The easiest way to get setup when you’re just starting out, is to simply have one web property for your website. You’ll be able to use filters to look at independent information, such as the traffic each of your specific pages receives – so you won’t need to create multiple web properties.
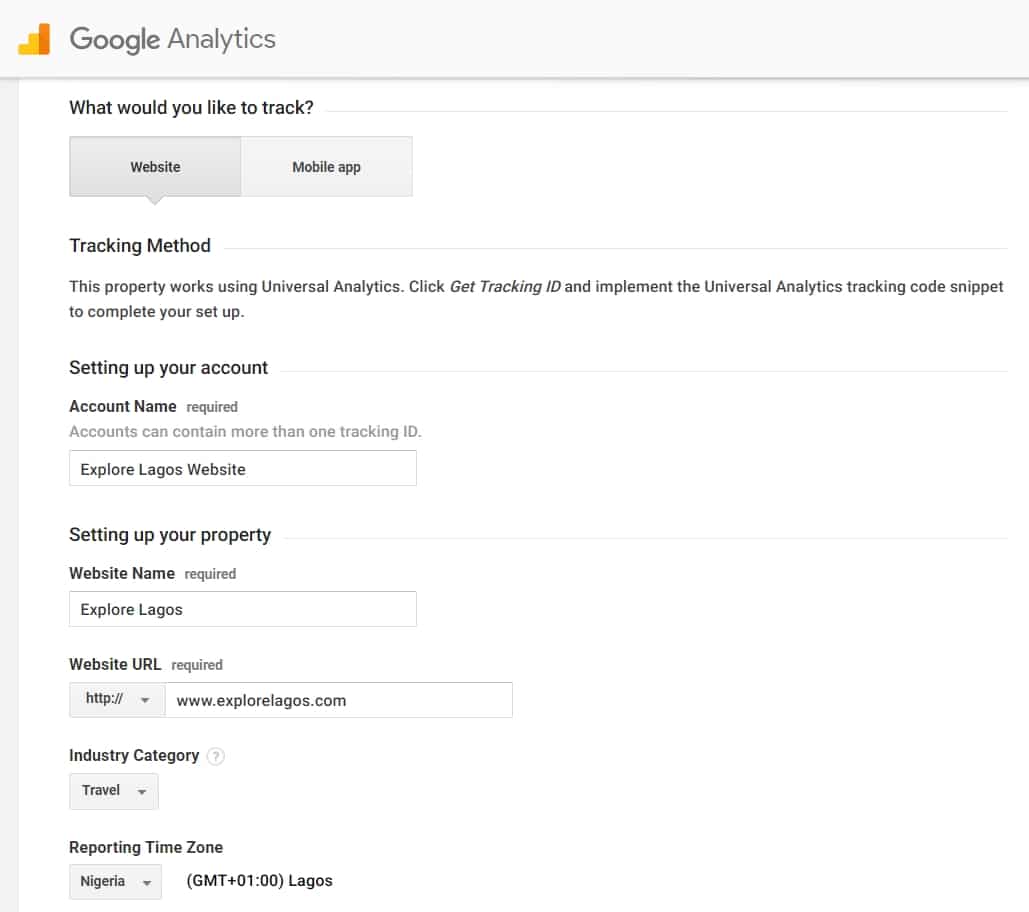
Give your account a name, and input the name of your website in the appropriate field. When entering your websites URL, you will need to either select http, or if you’re making use of an SSL certificate – the https option.
Industry Category
Next, you need to select the category of your industry from the drop-down menu. You should ensure to pick a category that’s most relevant to your website – it has an affect on how your website data will be presented on your Google Analytics dashboard.
Timezones
This area gives you the option to choose your time zone. Google tries to automatically detect the time zone that you are in, so the details in this field will be accurate most of the time; however you can change this by selecting another location from the drop-down menu that appears or typing it in manually.
The time zone you select is going to be the day boundary for your reports, regardless of where your traffic is coming from; for example, if you choose West Africa Time (WAT), then the beginning and the end of the day is calculated based on West Africa Time (WAT), regardless of if traffic is coming from New York, China, or Australia.
Your Tracking ID
The next section allows you to choose what options you want to share with Google. I suggest you go ahead and leave all of those checked, and continue to the bottom of the page down to the button where it says Get Tracking ID.
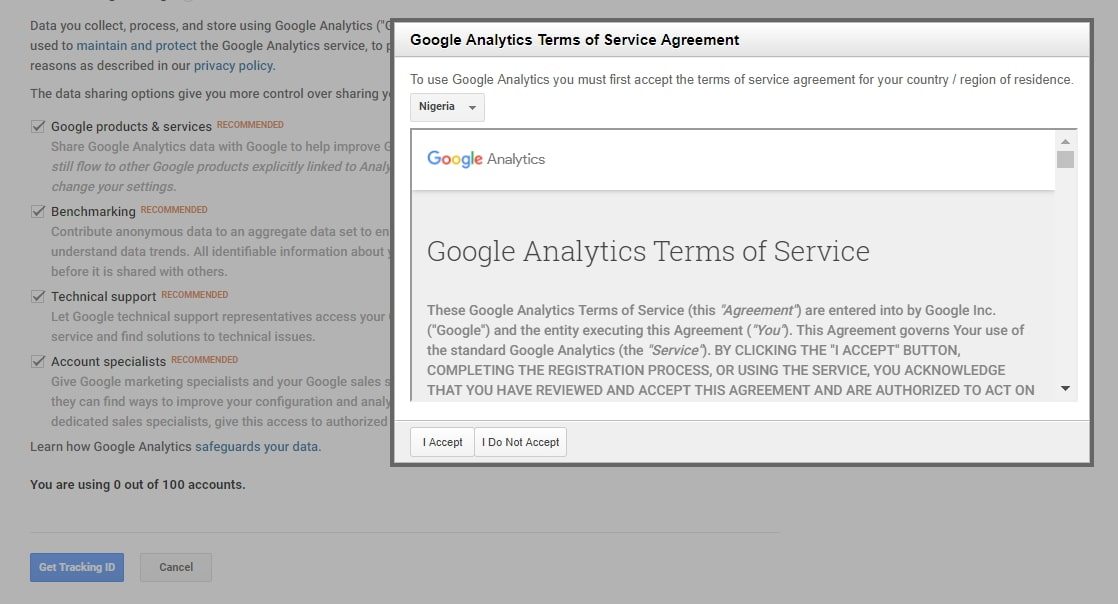
Once you click on this button, Google will ask you to accept the Terms and Service agreement; choose Accept once you’ve read through, and you will get redirected to a page with your tracking code.
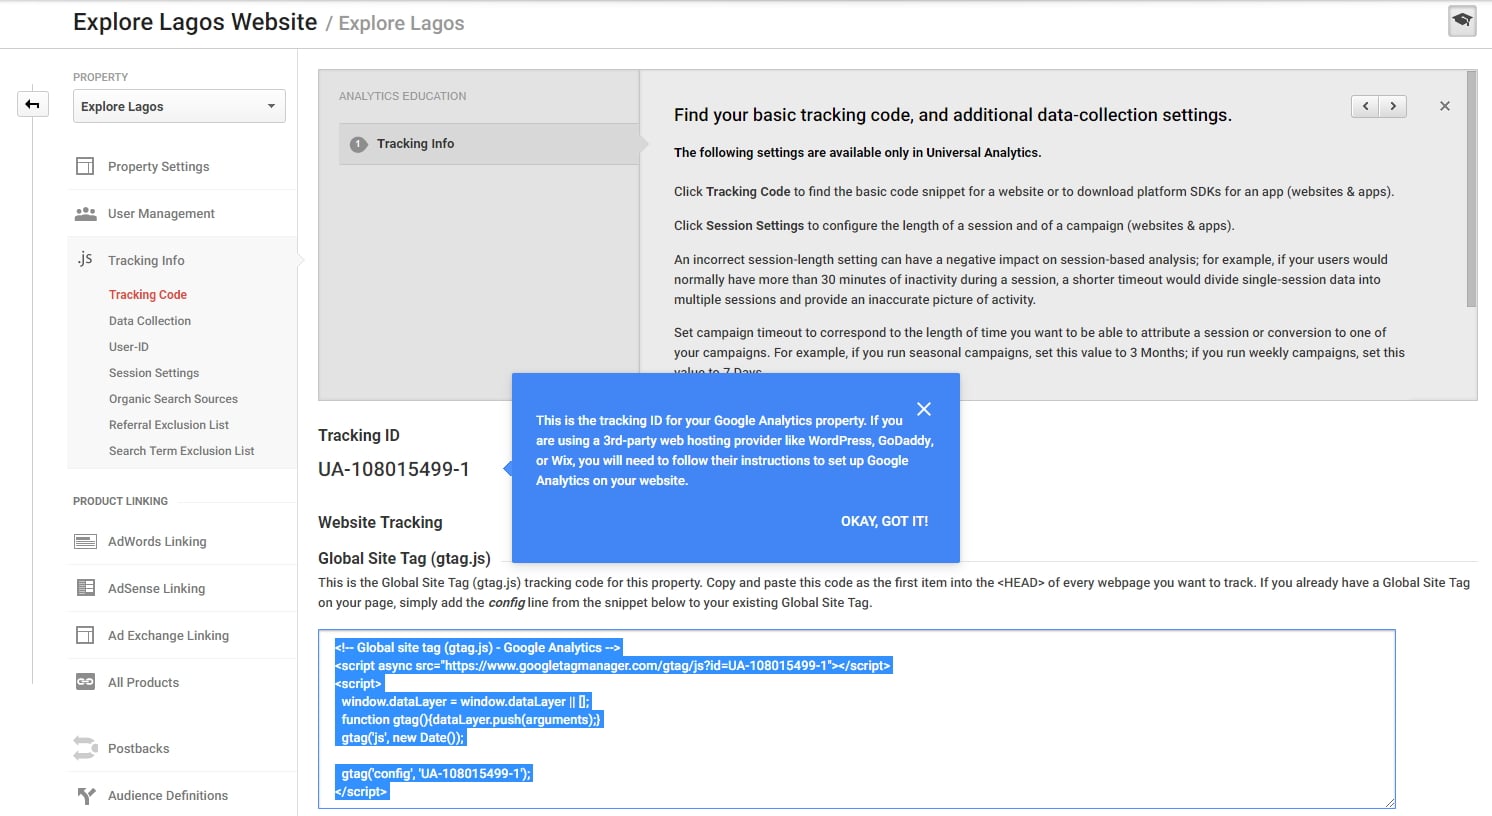
You can to read some information in the box that appears to learn about your tracking code, and if you scroll down, you’ll see the actual code that you need to integrate in your website.
You may also be interested in:
“Facebook Advertising & Targeting Opportunities”
“Evaluating Demand For Your Products & Services Online“
“Content Marketing Strategies – A Brief Overview”
Installing Your Tracking ID
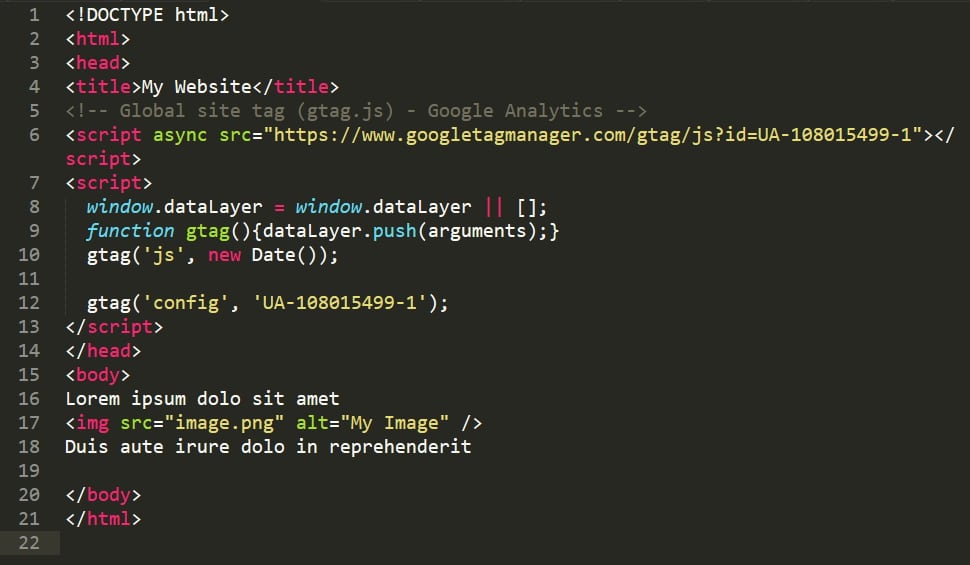
To install your tracking code you have to add that little snippet of code provided by Google Analytics into every page of your website. The way and manner you accomplish this will vary considerably across different website designs and Content Management Systems; however at the most basic level you will be need to paste your tracking code snippet directly above the ending “</head>” tag on every HTML page on your website.
Ascend is a Web design Agency located in Abuja – Nigeria; we are specialists at website development, online advertising and branding. Contact us to find out more.